
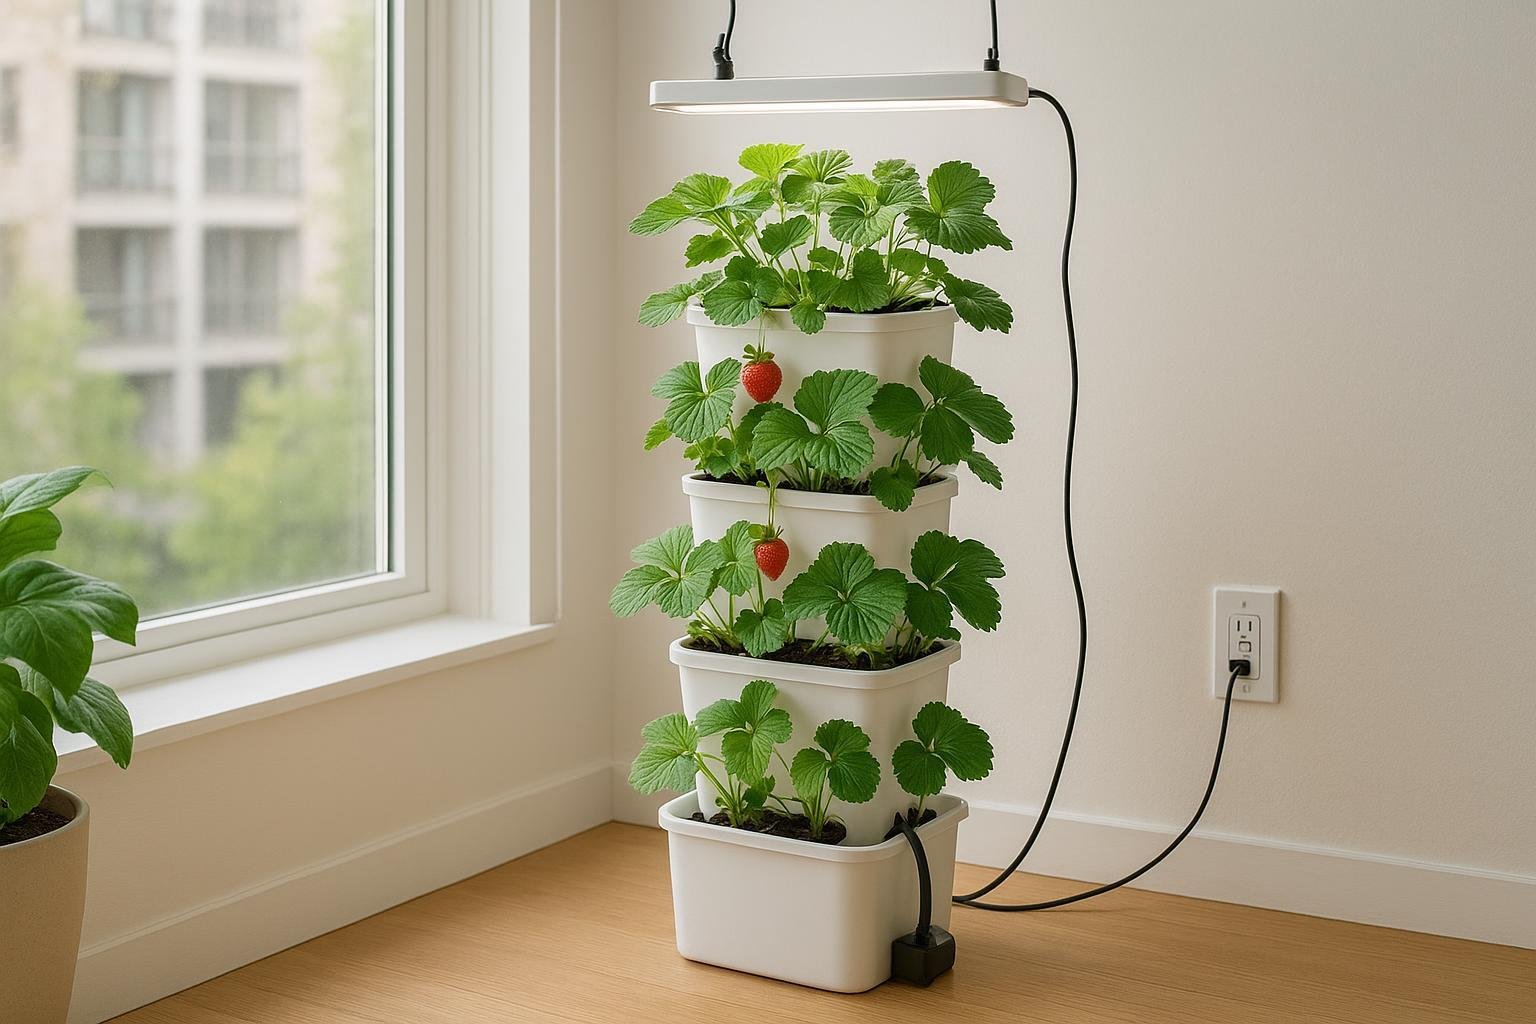
Want fresh berries year-round without soil? This step-by-step guide shows you how to build and run a semi-DIY strawberry hydroponics tower indoors near a bright window—with occasional supplemental LED lighting—for reliable growth, low mess, and great flavor.
Key takeaways
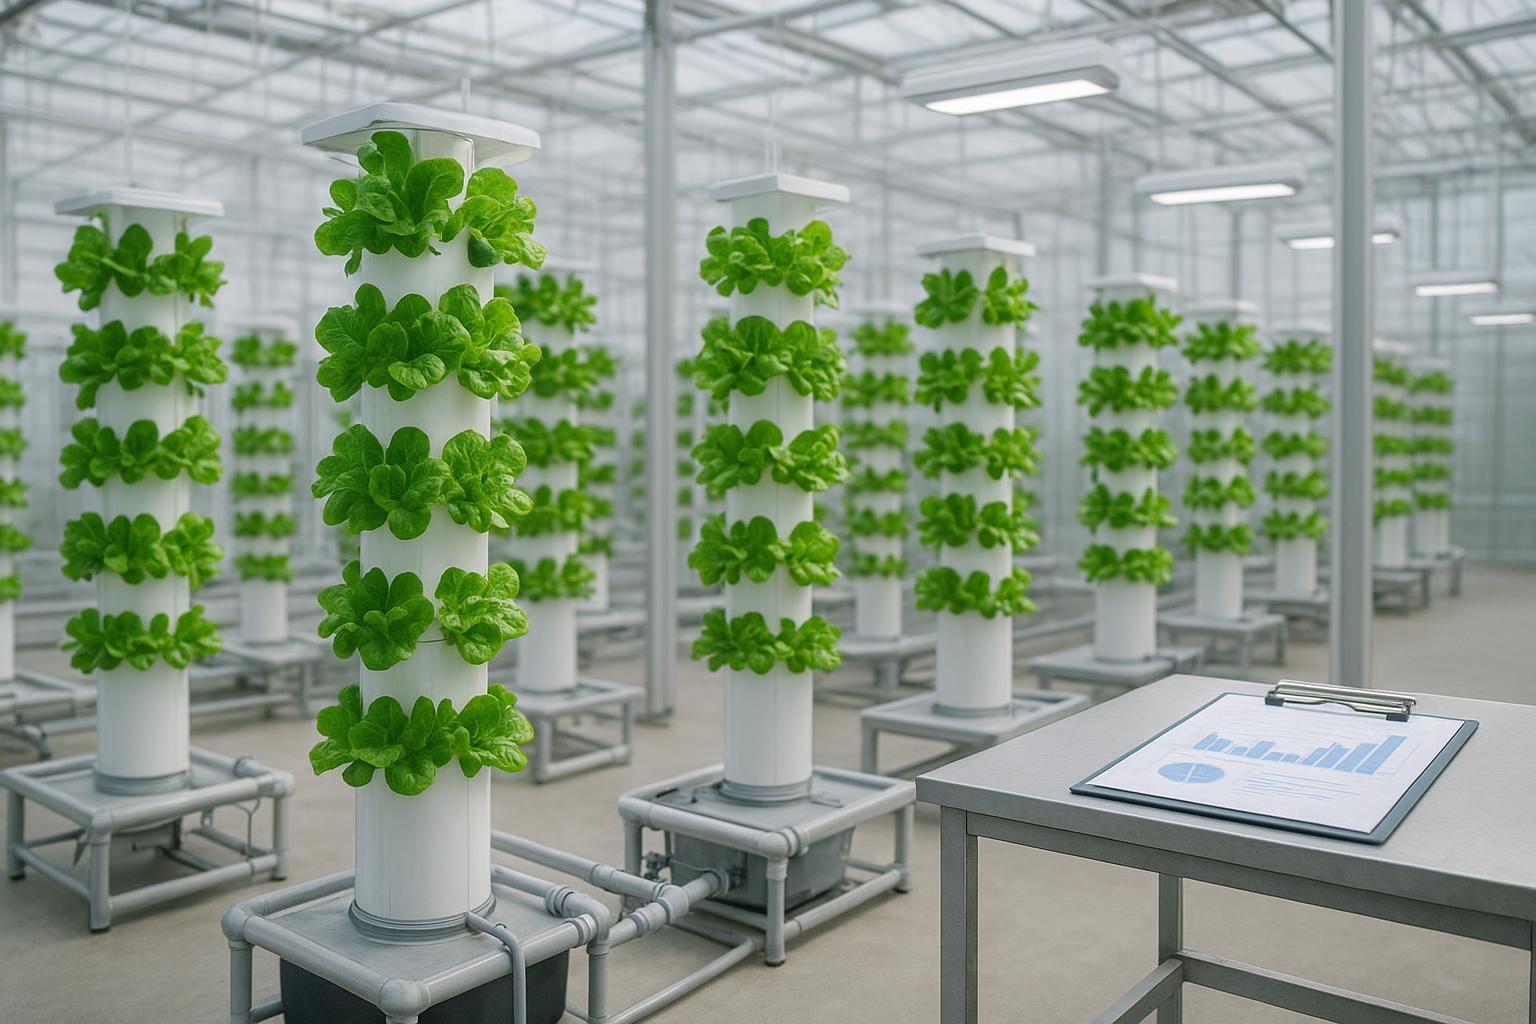
A strawberry hydroponics tower with stackable modules fits 20–28 plants and runs quietly indoors.
Start nutrients at pH 5.8–6.2 and EC 1.0–1.2 mS/cm, then increase slightly for fruiting.
Size the pump for your actual head height (5–7 ft typical) and aim to turn over the reservoir every ~2 hours.
Indoors near a window, supplement to reach a baseline DLI ≈ 17–20 mol·m⁻²·d⁻¹ (≈300–350 µmol·m⁻²·s⁻¹ for 14–16 h).
Hand‑pollination 2–3× per week improves fruit set in still indoor air.
Quick start
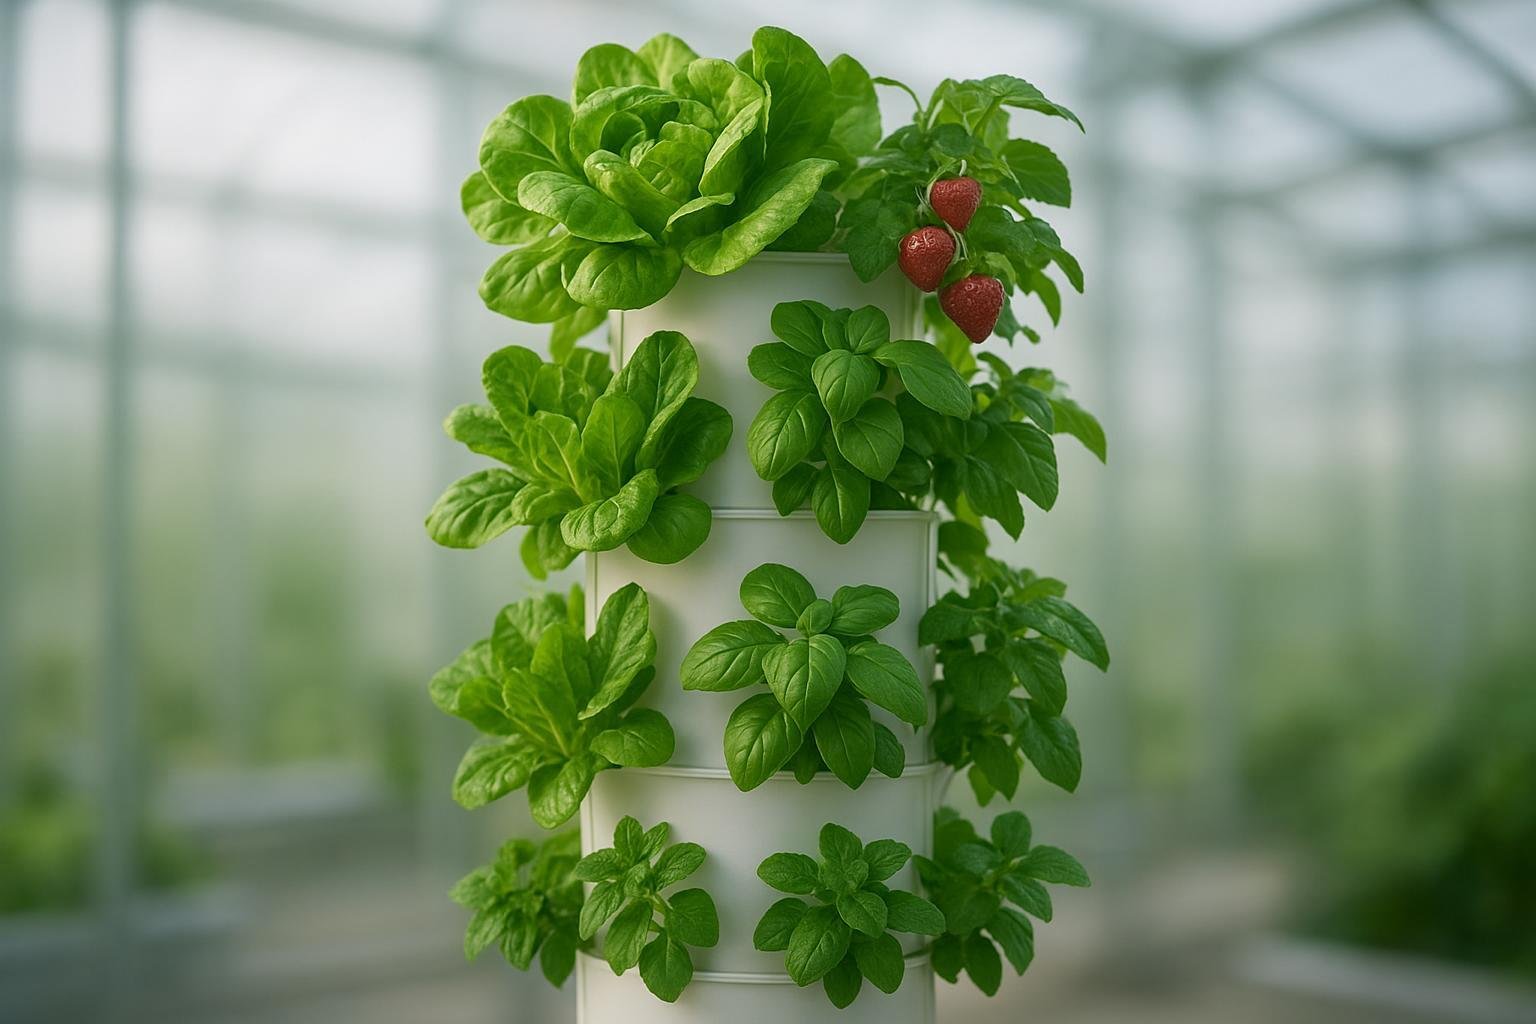
A single tower supports about 20–28 plants using 2-inch net pots spaced 6–8 inches vertically. Expect 2–4 hours of build time (plus commissioning and planting) and beginner-to-intermediate difficulty with semi‑DIY modules and simple plumbing.
For parts, plan on an opaque 15–30 gallon reservoir, a quiet submersible pump rated for at least 7 feet of head (often in the 350–400 GPH class), 3/8–1/2 inch food‑grade tubing with an inline mesh strainer, a union and valve for tuning, stackable tower modules, neoprene collars or inert media, a dimmable full‑spectrum LED on a timer, and calibrated pH/EC meters with hydroponic nutrients.
Build the strawberry hydroponics tower (step‑by‑step)
Prepare tools and parts (10–20 min) Gather a drill/driver, hole saws for fittings, a deburring tool, utility knife, zip ties, scissors, and PPE (gloves, eye protection). Collect the reservoir with lid cutout, stackable modules (20–28 sites total), 2-inch net pots, neoprene collars or inert media, a submersible pump (≥7 ft max head), 3/8–1/2 inch ID food‑grade tubing, an inline mesh strainer, a union and ball valve, stainless hose clamps, silicone sealant (aquarium/food‑safe), and a timer for lights.
Set the reservoir (10–15 min) Place the reservoir on a level surface near a GFCI outlet and window. Cut a tidy lid opening for the tower base and return path; keep the rest opaque to block light.
Stack the tower modules (15–25 min) Assemble modules per the manufacturer’s instructions to roughly 5–6 feet in height. Insert 2-inch net pots in each planting site (leave empty for now). Confirm the internal flow path isn’t obstructed.
Plumb the pump and top distributor (15–25 min) Seat the submersible pump in the reservoir and install the mesh strainer on the discharge side. Run 3/8–1/2 inch ID tubing up the tower to a simple top distributor (cap or insert with small holes) to spread flow evenly. Add a union and ball valve midline for maintenance and flow tuning; minimize sharp elbows.
Leak test and commission (20–30 min) Fill the reservoir with plain water and power the pump. Verify a gentle, continuous trickle down the tower and a full, splash‑free return. Check all joints and seals for leaks; retighten clamps and add silicone where needed. With flow steady, measure head height (waterline to top outlet) for pump tuning.
Safety and materials note Use a GFCI‑protected outlet and route power cords with drip loops, keeping electronics above the floor. Prefer food‑contact‑safe plastics like HDPE (#2), PP (#5), and unplasticized PVC (uPVC). Components that meet potable‑water standards (look for NSF/ANSI 61 labeling) help limit contaminant leaching in wet‑contact parts, as outlined in NSF’s overview of NSF/ANSI/CAN 61.
For tower geometry and plant site counts, Oklahoma State University Extension’s Building a Vertical Hydroponic Tower documents a proven 5–6 ft configuration with roughly 28 sites.
How to size and tune the pump for a strawberry hydroponics tower
Target: even distribution at the top with enough flow to refresh the reservoir roughly every 1.5–3 hours.
Head height is the vertical distance from the reservoir waterline to the tower’s top outlet, and it determines the pump’s real flow, not the 0‑ft rating on the box. For a single 5–6 ft tower, many home builders succeed with a quiet pump in the 300–400 GPH class as long as its max head is at least 7 feet and the flow at your measured head height still meets needs. ZipGrow’s method stresses verifying the manufacturer’s performance curve rather than trusting only the nominal GPH.
Prefer 3/8–1/2 inch ID tubing to reduce friction on short runs and keep elbows gentle. An inline valve lets you fine‑tune flow. Aim to move the reservoir volume about every two hours; for a 20‑gallon reservoir, that implies at least 10 GPH at actual head to refresh in two hours, but real systems need overhead for distribution and losses—hence the higher nominal pump class.
Quick lookup (illustrative starting recommendations—always confirm on your pump’s curve):
Setup | Measured head height | Nominal pump class | Notes |
|---|---|---|---|
1 tower, short room | 5 ft | 300–350 GPH | Quiet, low‑watt models often suffice if curve shows ≥80–120 GPH at 5 ft |
1 tower, typical | 6 ft | 350–400 GPH | Choose ≥7 ft max head; verify curve delivers consistent trickle |
2 small towers (manifold) | 6–7 ft | 400–500 GPH | Add valves per branch; consider 1/2 inch tubing |
Pro tip: A pump rated 800 GPH at 0 ft may fall to ~200 GPH at 6 ft and near zero at its max head. Always cross‑check the flow vs. head chart, as highlighted in ZipGrow’s pump sizing guidance.
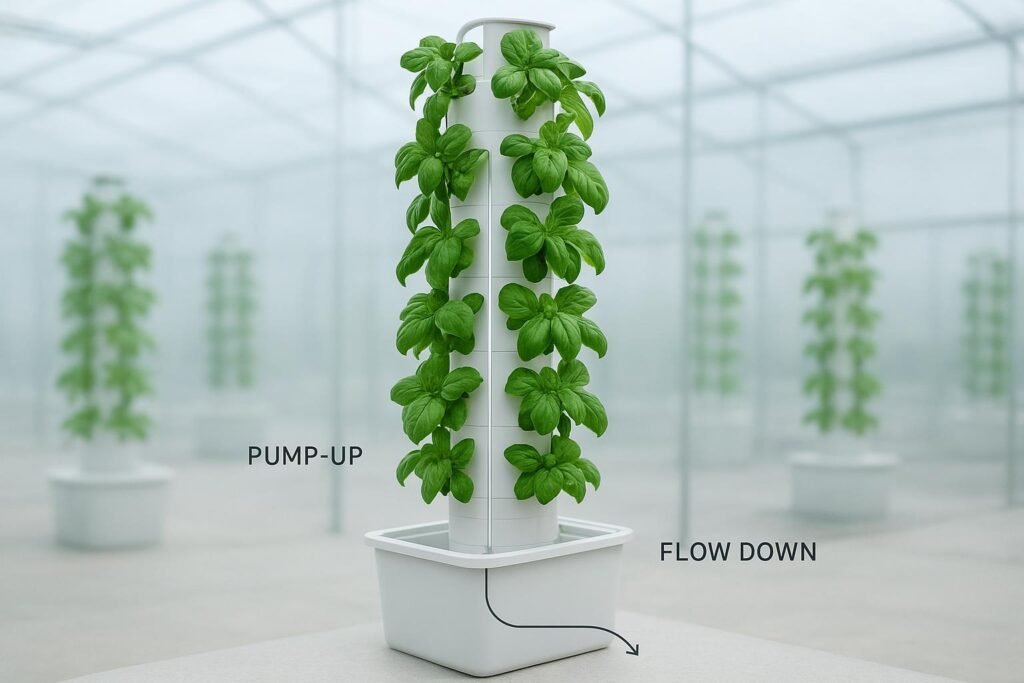
For layout references and component placement, Oklahoma State University Extension’s Building a Vertical Hydroponic Tower shows how a simple top distributor helps spread flow.
Nutrients, pH, and EC for hydroponic strawberries
Strawberries are relatively salt‑sensitive. Start conservatively, then adjust as the canopy fills and fruiting begins.
Calibrate meters first with fresh solutions—pH at 7.00 and 4.00; EC at 1.413 mS/cm (or 2.76 mS/cm)—and log readings. Target ranges:
Establishment: EC 1.0–1.2 mS/cm; pH 5.8–6.2
Vegetative: EC 1.2–1.6 mS/cm; pH 5.8–6.2
Fruiting: EC 1.4–1.8 mS/cm; pH 5.8–6.2 (raise slowly only if leaves and fruit remain healthy)
Top off with RO/filtered water daily and refresh fully every 10–21 days. Ohio State University’s Controlled Environment Berry Production notes solution pH near 5.5–6.0 and underscores strawberry salt sensitivity. Some industry guides list higher fruiting EC; the conservative approach is to start low and watch for tip burn or leaf‑edge necrosis before increasing.
For practitioner context, Hort Americas summarizes practical pH/EC and lighting tips for hydroponic strawberries.
Lighting indoors near a window
Your window contributes light, but most homes still need LEDs to hit a productive Daily Light Integral (DLI). Aim for a baseline DLI of about 17–20 mol·m⁻²·d⁻¹. If mainly using LEDs, set canopy PPFD around 300–350 µmol·m⁻²·s⁻¹ for 14–16 hours to approximate that DLI. Hang dimmable, full‑spectrum LEDs 12–18 inches above the top canopy and raise them as plants grow. Start modestly, then increase if leaves remain dark green and compact without bleaching. Keep a light breeze to manage leaf temperature and support pollination.
OSU’s strawberry lighting notes indicate a minimum DLI near 10–12 and an optimum near 20–25; extending photoperiod is an efficient way to reach targets indoors. Hort Americas’ strawberry essentials align with these ranges and practices.
Planting, pollination, and daily routine
Choose day‑neutral/everbearing cultivars for continuous indoor harvest—Albion, Monterey, San Andreas, and Seascape are common choices. Set crowns at the media surface (never buried). After planting, remove the first flowers for 2–4 weeks to let roots establish.
In still indoor air, assist flowers with a soft artist’s brush or a gentle electric toothbrush every 1–3 days while blooms are open. A small fan providing a gentle breeze improves consistency. Daily, confirm flow, check pH, top off with water, and do a quick pest scan with a brief pollination pass during bloom. Two to three times a week, check EC and inspect roots (white to cream is healthy). Every 10–21 days, perform a full nutrient change, rinse the reservoir, and sanitize exterior surfaces.
Troubleshooting: quick fixes
Tip burn or leaf edges browning usually indicates calcium transport issues or salt stress; lower EC toward the low end, improve airflow, avoid sudden jumps in light intensity, and maintain steady moisture. If roots brown or smell off, increase water movement/oxygenation (create more turbulence or add an air stone), keep the reservoir near 65–72°F, and sanitize between cycles. Uneven flow across sites often comes from a dirty strainer, kinks/clogs, an unlevel tower, or too many tight elbows—clean, straighten, and, if needed, upsize tubing or select a pump with better head performance. Poor fruit set or deformed berries improve with more frequent hand‑pollination, a gentler continuous breeze, adequate DLI, and moderate humidity so pollen doesn’t become sticky. For algae, block light leaks and keep the reservoir/tubing opaque.
Costs and what to expect
Plan for 8–12 weeks from transplant to first fruit if PPFD and nutrition are on target. Protected‑culture observations suggest roughly 0.5–1.0 lb per plant per cycle, with higher yields possible in optimized environments and with the right cultivar. Small quiet pumps often draw 15–35 W; dim LEDs just enough to hit PPFD/DLI targets. Refresh nutrients every 10–21 days and keep a spare pump on hand to minimize downtime.
For a design baseline and plant‑site counts, Oklahoma State University Extension’s Building a Vertical Hydroponic Tower documents a simple 5–6 ft tower with ~28 sites. For lighting and nutrient guardrails, OSU’s strawberry lighting and fertigation notes offer useful ranges, and Hort Americas’ strawberry essentials provide practitioner context. ZipGrow’s pump sizing guidance explains how to use performance curves instead of nominal ratings.
Next steps
Keep a grow log noting pH, EC, PPFD/photoperiod, and any leaf or fruit symptoms. Small, steady tweaks beat big swings. If you later scale to a second tower, add a simple manifold with valves and revisit pump curves.
Disclosure: SPRINGS FAITH is our product. Commercial‑grade hydroponic tower systems like those from SPRINGS FAITH can inform your parts choices and layout when you want durable, modular components for a home‑scale build.
FAQs
How often should I run the pump? In a simple recirculating tower, run continuously for an even trickle. If heat or noise is a concern, test short off cycles only after plants are established and roots stay moist; ensure overall reservoir turnover within about two hours.
What pH and EC should I target for strawberries? Start pH 5.8–6.2 and EC 1.0–1.2 mS/cm, then adjust gradually toward 1.4–1.8 mS/cm in fruiting if plants remain healthy. Monitor for salt stress.
How bright should my LED be? Aim for around 300–350 µmol·m⁻²·s⁻¹ at the canopy for 14–16 hours. Combine with window light to reach a DLI around 17–20 mol·m⁻²·d⁻¹.
Do I need special plastics? Prefer food‑safe materials and, where practical, components that meet potable‑water standards like NSF/ANSI 61. Use an opaque reservoir to limit algae.
Which varieties work indoors? Day‑neutral types such as Albion, Monterey, San Andreas, and Seascape perform well indoors with steady light and nutrition.
Related Posts
 Hydroponic vs Aeroponic Towers (2026): Which System Is Better for Your Plants?
 What Can You Grow in a Hydroponic Tower? 15 Best Plants for Vertical Growth
 Hydroponic Tower Cost Analysis: Is It Worth the Investment? (Plus DIY Options)
